
Adjustment Entry
Adjustments are used to either increase or decrease the balance on a patient’s account. This can be done for many reasons.
- Refund – (Positive Adjustment) When a patient is in need of a refund, it is because they or their insurance carrier have paid more than is necessary. This causes that patient’s AR total to be smaller than it should be. When a refund is issued, the office is correcting that discrepancy. Refund adjustments will increase the patient’s AR total (and simultaneously decrease the practice accounts payable total).
- Disallowed Amount Adjustment – (Negative Adjustment) When billing insurance carriers, if you bill for an amount higher than the allowed amount, you will be required to write off the difference between the billed amount and the allowed amount. These write-offs are done using adjustments. Medisoft Advanced and Medisoft Network Professional will calculate and enter these adjustments automatically using the deposit list. Medisoft Original users must enter these adjustments through Transaction Entry. This process will lower the patient’s AR total.
- Courtesy Adjustment – (Negative Adjustment) If you want to write off a balance as a courtesy to your patients this is done using an adjustment. This process will decrease the patient’s AR total.
- Small Balance Write-Off – (Negative Adjustment) Many patients carry balances that are so small that it is not worth it to try and collect the balance. These balances are cleared using a Small Balance Write-Off. Medisoft Advanced and Medisoft Network Professional contain a utility that will automatically perform these write-offs. Medisoft Original users must manually enter these adjustments through Transaction Entry. This process will decrease the patient’s AR total.
- Error Correction – (Negative OR Positive Adjustment) During the billing process, you will find that data entry errors are made. Patients may be charged too much, or too little. A payment may be entered for the wrong amount. These corrections should generally be made using error correction adjustments. This gives you a complete record of what was originally entered, and the steps taken to correct the error. Deleting charges and payments is not recommended, as you will not have this record of what was previously entered.
- Take Back Adjustment – (Positive Adjustment) Take Back adjustments are used when insurance carriers have overpaid on a charge. Often these carriers will take the money back on a future EOB. The patient with the overpaid charge may not be on the EOB where the money was taken back. If a charge was overpaid by an insurance carrier, the balance on that charge is artificially low (it has been overpaid). Because the balance on the charge is lower than it should be, we need to RAISE the balance (and therefore the patient AR total). Medisoft Original users must do this through Transaction Entry. Medisoft Advanced or Network Professional users can enter these adjustments through the Deposit List.
- Withhold Adjustment – (Negative Adjustment) Withhold adjustments are usually used in conjunction with Take Back adjustments. When a provider receives an EOB that has had compensation withheld due to previous overpayment, they still need to pay the balances that would have been paid if not for the previous overpayment. This is done using withhold adjustments. Medisoft Original users must do this through Transaction Entry. Medisoft Advanced or Network Professional users can enter these adjustments through the Deposit List.
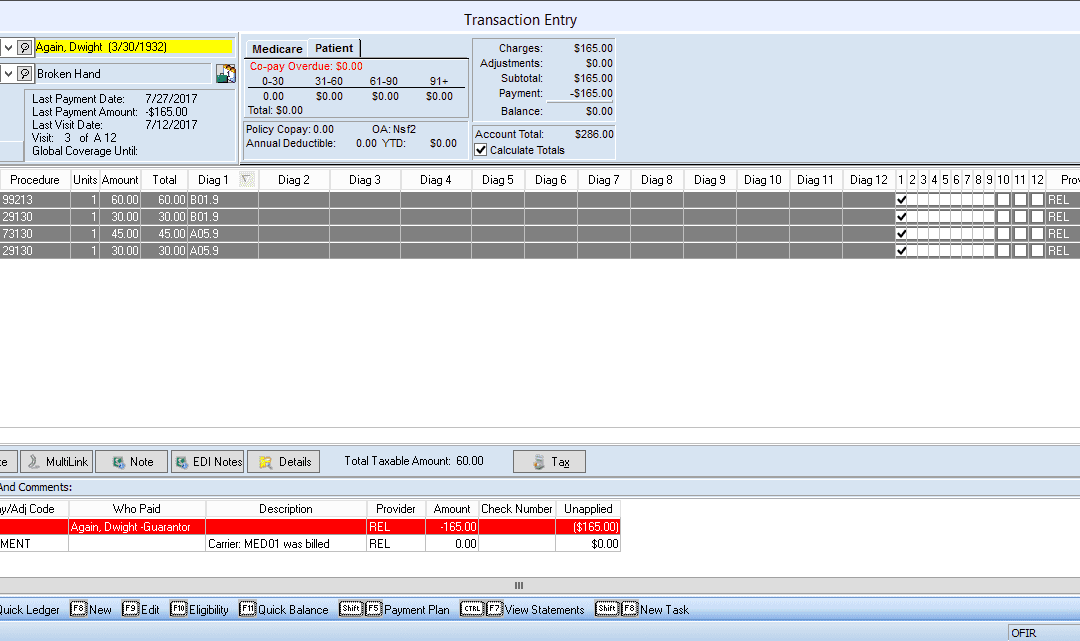
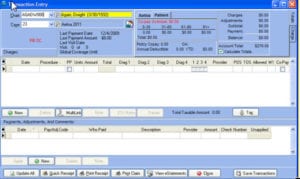
Adjustments are entered into the lower portion of the Transaction Entry screen. There are fields here that apply to adjustments, and there are fields that do not apply to adjustments. In this section, we will discuss only the fields that apply to adjustments.
Date: The date field functions the same way when entering adjustments as it did for charges.
Pay/Adj Code: This is the field where you enter the adjustment code for the type of adjustment you would like to enter. Generally, these codes should have been set up previously. (See MED103: Getting Started) If the code is not already set up at this point, you can press the [F8] button with your cursor in the Pay/Adj Code field to create a new code. If the code is set up but you wish to edit the properties of this field, you can press the [F9] button with your cursor in this field.
Who Paid: This field is not necessary when entering adjustments.
Description: Enter any additional descriptions you wish to add to the adjustment you are entering.
Provider: If you want to be able to track adjustments by providers, enter the provider responsible for the amount being adjusted into the Provider field.
Amount: The Amount field is the key field when dealing with adjustments. Most adjustments are entered with the intent of lowering the balance. In order to accomplish this, you should enter a minus sign (-) and then the amount you wish to write off or adjust off. If you have set up your procedure codes properly, the minus sign will automatically be entered for you. In order for this to be automatically added, the field labeled Make Adjustment Negative must be checked within the adjustment code screen.
If this field is not checked, the minus sign will not be automatically added, and any number entered without manually typing the minus sign will be viewed as a positive adjustment.
Check Number: This field is not necessary when entering adjustments.
Unapplied: After entering an adjustment, it is important that you apply that adjustment to specific charges. The balance you need to adjust is attached to specific charges. If you do not apply your adjustment to those charges, your balance numbers could be incorrectly calculated. The Unapplied field shows you what portion of the adjustment has not yet been applied.
Once you have entered all applicable fields, click Save Transactions.
Adjustment Application
As stated, after entering your adjustments, you need to apply that adjustment to specific charges. This is done by clicking the Apply button in the lower left portion of the Payment/Adjustment entry section of the Transaction Entry screen.
Once you click the Apply button, the following screen will appear.
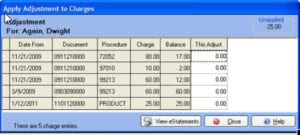
The charges that appear on this screen will be limited to the charges that appear on the Transaction Entry screen. This means you will only see charges for the selected chart number, case number, and possibly document or superbill number. If you are using document numbers or superbill numbers, you can see charges that are not linked to the specific document or superbill number by clicking the Show All field prior to clicking the Apply button.
The charges listed will show you the Date From (or date of service), the Document Number (or Superbill number), the Procedure Code, the original charge amount, and any remaining balance on that specific charge. You will only see one column that will allow you to make any entries. That column is the This Adjust column. In this column, you will enter the portion of the adjustment that will be applied to each individual charge. You can either apply the entire amount to one charge, or split the adjustment up and apply the same adjustment to multiple charges.
You should apply the adjustment until the Unapplied amount at the top of the screen shows 0.00.
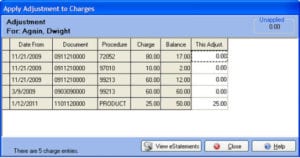
Once you have completely applied the adjustment, click the Close button. You will return to the main Transaction Entry screen. Click the Save Transactions button. You have now entered and applied an adjustment.

Recent Comments